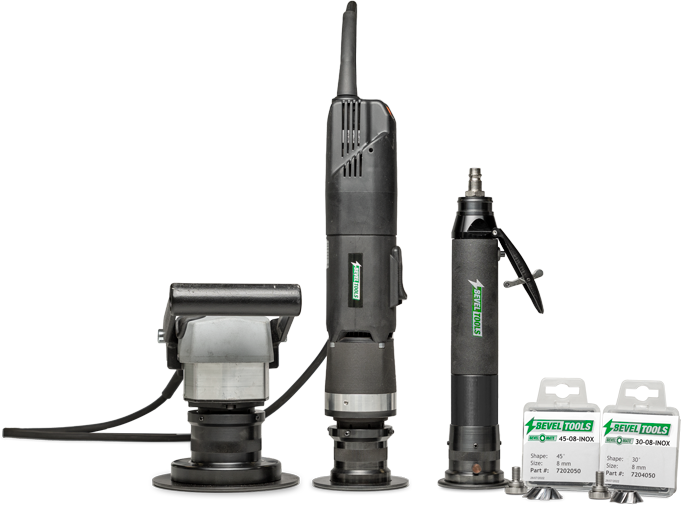
Complete product range for working on Inox
Mastering the art of beveling and rounding edges on stainless steel with handtools has historically posed significant challenges. The precision required, coupled with the absence of suitable tools, has often led to rapid wear and tear of inserts, radius cutters, and grinding discs. After extensive research and dedicated development, we proudly present our innovative INOX platform.
Our cutting-edge INOX beveling machines have revolutionized the process, making it effortless to tackle even the most resilient metals. Experience enhanced longevity for your bevel cutter, as we’ve harnessed the power of innovation to ensure lasting durability. On this platform, we’re delighted to guide you through the process of beveling inox edges, showcasing the seamless efficiency of our new tooling.
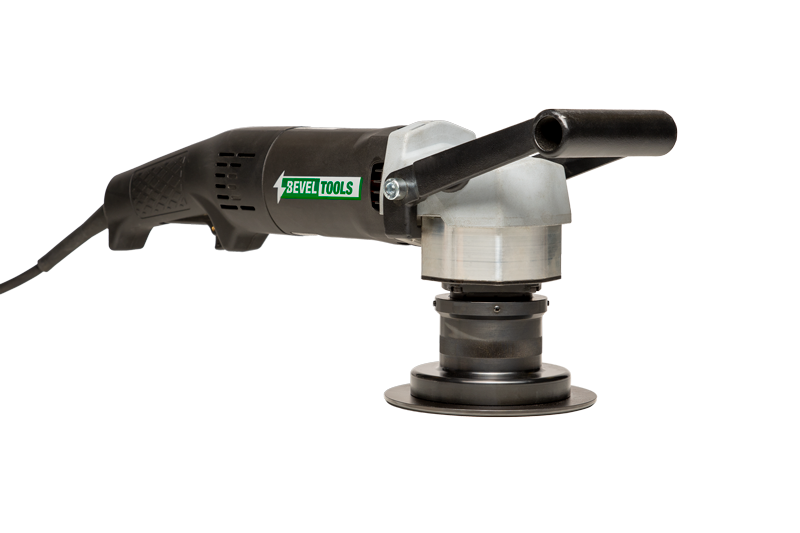
Largest among the three specialized INOX machines, this model is tailored for larger work pieces, bars, and flanges. Additionally, it enhances your ability to achieve greater depth for bevels or radii.
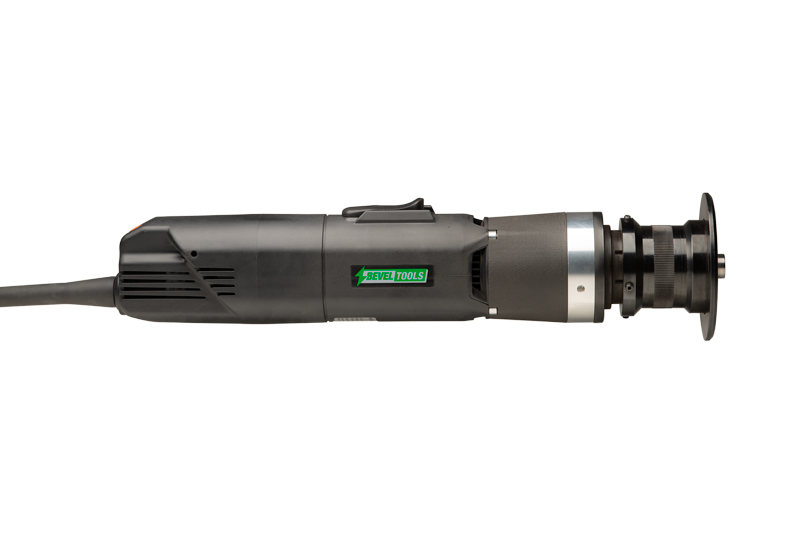
Crafted with precision for compact products, shapes, holes, and flanges, our EBI INOX stands as a lightweight and effortlessly manageable solution.

Operating on pneumatic power, this machine mirrors the specifications of the EBI INOX model.
Crafting smooth beveled and rounded edges on stainless steel was once a challenging and time-intensive endeavor. However, with the advent of our INOX platform, this task has been greatly simplified. Explore our instructional video and gain comprehensive insights into utilizing these innovative tools.
While other tools may perform the task, the coarseness of the stainless steel tends to dull the cutters rapidly. Enter our groundbreaking INOX series, a solution previously absent from the market, tailored exclusively for beveling and rounding stainless steel. These machines are meticulously engineered to excel in stainless steel cutting, ensuring prolonged cutter lifespan. Explore further insights on utilizing these specialized machines for inox applications.

Step 1
Check the adapter and cutter
Before you get started: make sure the machine is unplugged or removed from the air hose. Next: check that your adapter and the shear pin are in good condition. If either is damaged, you must replace it before you start using the machine. Damaged parts can shorten the service time of the cutters.
Step 2
Attach the bevel cutter to the adapter
If there’s no damage to your cutter, you can now attach it to the adapter. Carefully place the cutter on the adapter, so that it rests completely flat on the surface. Also, make sure the small pin is exactly in the pinhole of the cutter. Now torque it to the machine using your guide bearing and the HEX key included.
Step 3
Lock the spindle
Now that you’ve attached the cutter, lock the machine’s spindle by pressing the locking button on the back of the machine. When the spindle is locked, torque the cutter more tightly to the machine.
Step 4
Choose the cutter’s depth
Adjust the depth of the cutter by turning the flange head. The bottom surface of the flange should always be at exactly the same height as the starting point of the radius.
Step 5
Choose the right rotation speed
You are now ready to use your beveling machine, but before you do: make sure you always wear protection glasses and ear protection. Now that you’re all safe, it’s time to plug in the power connector or connect your air hose. Choose your rotation speed by using the button on the back of the machine. You can choose between different speed settings from 1 to 6. Level 1 and 2 are specially for inox edges. Higher levels are for normal construction steel that is softer.
Step 6 a
Start with beveling
Now it’s time to start using the beveltool. It’s very important to always turn on the machine before the cutter touches the metal edge. A cutting edge can easily get slightly damaged if it hits the side of a metal object. When you start beveling or rounding, first put the flange on the surface of the metal only. Then push the cutter into the edge.
Step 6 b
Beveling the metal
Now, move the machine in the correct direction while you turn the machine slowly and proceed by pushing forward. Keep your forward speed as high as possible without losing the fine results of the cutter. Try to keep a steady pace of 1 to 3 meters per minute.
Step 7
Check your edge
Stop after a couple of meters and check that your bevel end is complete. If not, simply adjust the flange head a little bit.
Step 8
Managing the corners
When going around a corner, turn your beveling machine 90 degrees and start working off the metal from right to left.
Step 9
Making a bevel end on a hole
The principle of rounding a hole is the same as with the outside of a sheet, bar, or shape. Start the machine before the cutter touches the edge. First put the flange on the metal surface, and then push it a little deeper into the metal. Always round the hole in a clockwise manner.
Step 10
Finish off the last corner
Now you’re almost done. The only thing you still have to do is finish off the last corner. Turn the machine 90 degrees and work off the corner from right to left until it is nicely rounded. And voila, you just worked a robust piece of stainless steel. Easy, right?
If you’re interested in using our products and would like to try it out first, you can request a demo. We will contact one of our dealers as soon as possible and ask them to get in touch.